Difference between revisions of "Terracoin Electrum Wallet"
| Line 95: | Line 95: | ||
==Sending and receiving== |
==Sending and receiving== |
||
| + | |||
| + | You may own TRC stored in another software wallet, or on an exchange such as [CoinExchange https://www.coinexchange.io/market/TRC/BTC] or [Cratex https://cratex.io/index.php?pair=TRC/BTC], or simply want to send or receive funds as a wage or business transaction. Funds can be transferred between these source and the Terracoin Electrum wallet using Terracoin addresses. Your wallet contains multiple addresses, and will generate new addresses as necessary. Since the Terracoin blockchain is transparent to the public, it is considered best practice to use a new address for each transaction in order to maintain your privacy. |
||
| + | |||
| + | |||
| + | ===Sending=== |
||
| + | |||
| + | Click the '''Send''' tab to make a payment. Enter the destination address in the '''Pay to''' field, selecting a contact from the Contacts tab or manually or by pasting from the clipboard. Optionally enter a '''Description''' for to appear in your transaction history, followed by the '''Amount''' to be sent. The total amount of the transaction is the sum of the sent amount and transaction fee, which is calculated automatically. Terracoin Electrum issues a warning if the total transaction amount exceeds the wallet balance. |
||
| + | |||
| + | [[File:Terracoin-electrum-sending.png]] |
||
| + | |||
| + | ''Transaction ready to send in Terracoin Electrum wallet'' |
||
| + | |||
| + | The wallet will request your password, then broadcast the transaction to the network and display a confirmation dialog with your transaction ID. |
||
| + | |||
| + | [[File:Terracoin-electrum-send-password.png]][[File:Terracoin-electrum-send-confirmation.png]] |
||
| + | |||
| + | ''Password prompt and transaction confirmation in Terracoin Electrum wallet'' |
||
| + | |||
| + | |||
| + | ===Receiving=== |
||
| + | |||
| + | You can view your receiving addresses by clicking the Receive tab. Double-click the '''Receiving address''', then copy it to the clipboard by clicking the Copy to clipboard icon. If you intend to use the address repeatedly, you can also enter a description click Save to store the address in the Requests list. Clicking an address in the list will display the stored information in the top area, together with a QR code containing the same information. |
||
| + | |||
| + | [[File:Terracoin-electrum-receiving-pending.png]] |
||
| + | |||
| + | ''Transaction ready to send in Terracoin Electrum wallet'' |
||
| + | |||
| + | Enter this address in the software sending the funds, send it to the person transferring funds to you or scan it directly from your mobile wallet. Once the transaction is complete, the balance will appear in the lower left corner of your wallet, and the indicator in the '''Requests''' table will change from '''Pending''' to '''Paid'''. |
||
| + | |||
| + | [[File:Terracoin-electrum-receiving-paid.png]] |
||
| + | |||
| + | ''Successfully received payment in Terracoin Electrum wallet'' |
||
| + | |||
| + | Once you have used an address, you can either continue using it or click '''New''' to generate a new address. |
||
| + | |||
| + | |||
| + | ===Monitoring transactions=== |
||
| + | |||
| + | The '''History''' tab lists all current and pending transactions. A transaction to an address in your wallet will appear in the list soon after it is made. Initially, this transaction will be marked as Unconfirmed, followed by a clock indicator on the left. As the Terracoin network processes the transaction, the status will update in the transaction history list. The network confirms transactions with a new block roughly every 2 minutes, and a transaction is considered confirmed (and therefore spendable) after six confirmations. These processed transactions are denoted with a green checkmark and the timestamp at which the transaction was made. |
||
| + | |||
| + | [[File:Terracoin-electrum-history-unconfirmed.png]] |
||
| + | |||
| + | [[File:Terracoin-electrum-history-confirmed.png]] |
||
| + | |||
| + | ''Terracoin Electrum wallet History tab immediately after receiving a transaction and after confirmation is complete'' |
||
| + | |||
| + | To view additional transaction details, right click a transaction on the '''History''' tab and select '''Details''' from the context menu. You can also use this menu to copy the transaction ID to the clipboard (this can be used as proof that a given transaction occurred), edit the transaction description for your records or view the transaction on an external block explorer. |
||
| + | |||
| + | [[File:Terracoin-electrum-history-transaction.png]] |
||
| + | |||
| + | ''Transaction details in Terracoin Electrum wallet'' |
||
Revision as of 14:57, 27 July 2019
Terracoin Electrum is a light wallet which uses powerful external servers to index the blockchain, while still securing the keys on your personal computer. Transactions are verified on the Terracoin blockchain using a technique called Secure Payment Verification (SPV), which only requires the block headers and not the full block. This means that wallet startup is almost instant, while still keeping your funds secure and mobile. It does not currently support advanced InstantSend and PrivateSend features.
Terracoin Electrum is a fork of the Electrum wallet for Bitcoin. While this documentation focuses on using Terracoin Electrum, full documentation of all Bitcoin Electrum features (mostly identical in Terracoin Electrum) is available at the official documentation site.
Contents
Installation
Download
You can download Terracoin Electrum from the official Terracoin website or the Terracoin Electrum minisite.
Terracoin Electrum is developed by The Terracoin Foundation and is released through GitHub.
You can optionally verify the integrity of your download by running the following commands (example for Linux):
wget https://github.com/terracoin/electrum-trc/releases/download/3.3.8/Terracoin-Electrum-3.3.8.tar.gz
sha256sum https://github.com/terracoin/electrum-trc/releases/download/3.3.8/Terracoin-Electrum-3.3.8.tar.gz
wget https://github.com/terracoin/electrum-trc/releases/download/3.3.8/SHA256SUMS.txt.asc
cat SHA256SUMS.txt.asc
Linux
As of version 3.0.6, it requires Python 3 to run.
Enter the following commands (changing the version number to match the current version as necessary) in the terminal to install Terracoin Electrum from the source tarball:
sudo apt install python3-pyqt5 python3-pip python3-setuptools
wget https://github.com/terracoin/electrum-trc/releases/download/3.3.8/Terracoin-Electrum-3.3.8.tar.gz
tar -zxvf Terracoin-Electrum-3.3.8.tar.gz
cd Terracoin-Electrum-3.3.8
sudo python3 setup.py install
macOS
Simply download and run the DMG file. You may need to grant permission to install, depending on your security settings. Click through the installation wizard and run Terracoin Electrum from your Applications folder when complete.
Windows
Simply download and run the installer file to set up Terracoin Electrum. You may need to grant permission to install, depending on your security settings. Click through the installation wizard and run Terracoin Electrum from the Start menu when complete.
Android
Download and run the APK file from https://terracoin.io/electrum/ to set up Terracoin Electrum. You may need to grant permission to install from unknown sources, depending on your security settings. Click through the installation wizard and run Terracoin Electrum when complete.
Creating a New Wallet
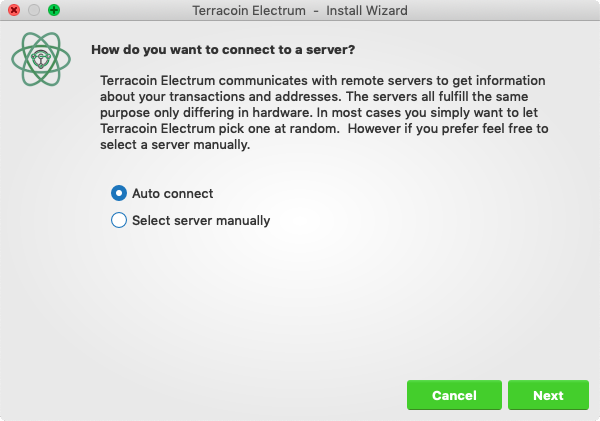
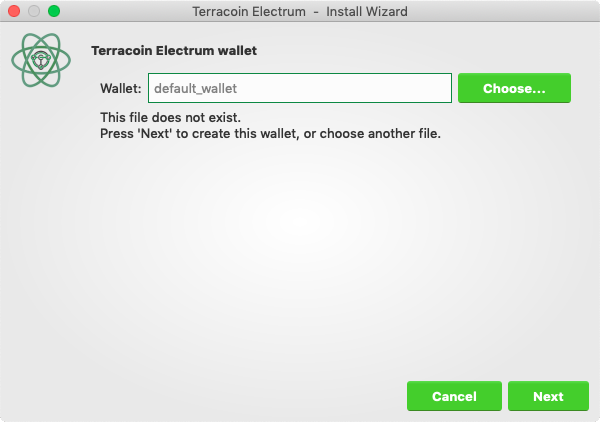
Terracoin Electrum gathers configuration data when run for the first time. For more on the concepts behind this process, skip to the later sections of this guide discussing backups, security, and addresses. When setting up Terracoin Electrum for the first time, a wizard will guide you through the process of creating your first wallet. The first screen asks how you would like to connect to the remote server. Select Auto connect and click Next to continue. You will see a notice that no wallet currently exists. Enter a name for your wallet (or accept the default name) and click Next to create your wallet.
Selecting the server and naming your first wallet
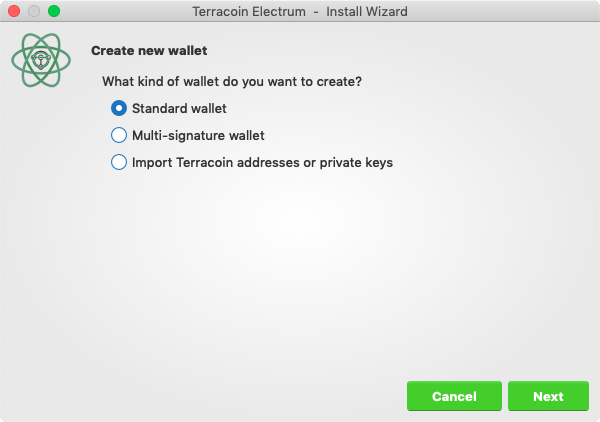
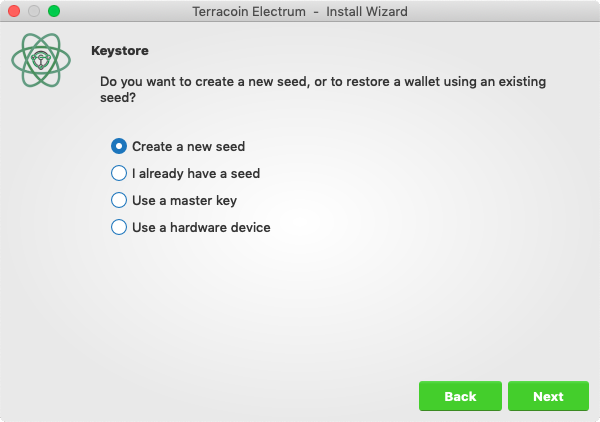
You will be asked what kind of wallet you want to create. Choose between Standard wallet, Multi-signature wallet and Watch Terracoin addresses. If you are unsure, select Standard wallet and click Next to continue. You will then be asked how you want to store/recover the seed. If stored safely, a seed can be used to restore a lost wallet on another computer. Choose between Create a new seed, I already have a seed, Use public or private keys or Use a hardware device. If you are using Terracoin Electrum for the first time and not restoring an existing wallet, choose Create a new seed and click Next to continue.
Selecting the wallet type and keystore
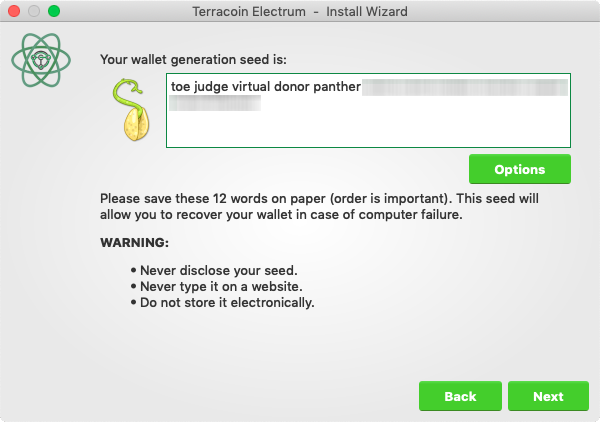
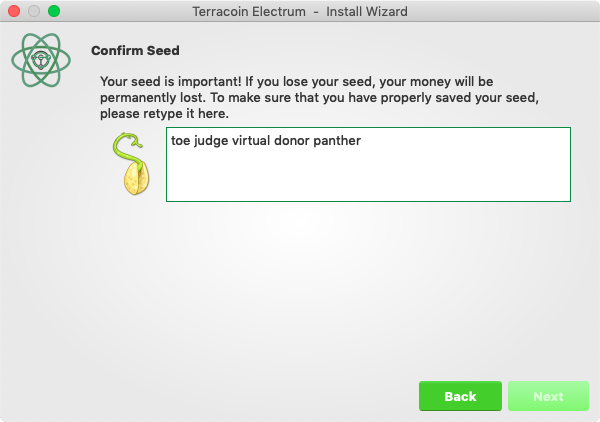
Terracoin Electrum will generate your wallet and display the recovery seed. Write this seed down, ideally on paper and not in an electronic format, and store it somewhere safe. This seed is the only way you can recover your wallet if you lose access for any reason. To make sure you have properly saved your seed, Terracoin Electrum will ask you to type it in as a confirmation. Type the words in the correct order and click Next to continue.
Generating and confirming the recovery seed
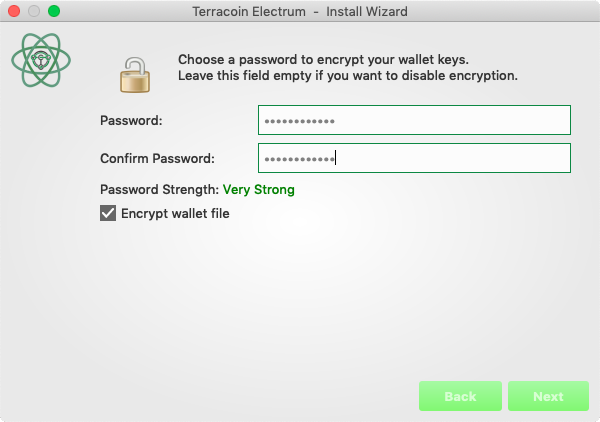
A password optionally secures your wallet against unauthorized access. Adding a memorable, strong password now improves the security of your wallet by encrypting your seed from the beginning. Skipping encryption at this point by not selecting a password risks potential theft of funds later, however unlikely the threat may be. Enter and confirm a password, ensure the Encrypt wallet file checkbox is ticked and click Next to continue.
Entering and confirming a wallet encryption password
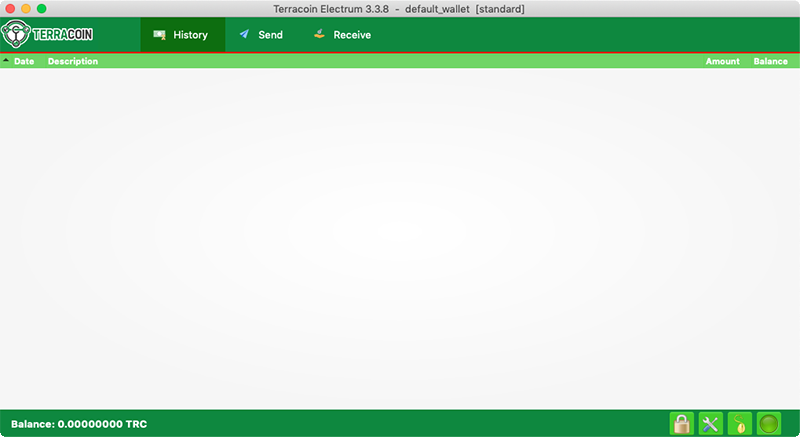
Your Terracoin Electrum wallet is now set up and ready for use.
Terracoin Electrum after setup is complete
Sending and receiving
You may own TRC stored in another software wallet, or on an exchange such as [CoinExchange https://www.coinexchange.io/market/TRC/BTC] or [Cratex https://cratex.io/index.php?pair=TRC/BTC], or simply want to send or receive funds as a wage or business transaction. Funds can be transferred between these source and the Terracoin Electrum wallet using Terracoin addresses. Your wallet contains multiple addresses, and will generate new addresses as necessary. Since the Terracoin blockchain is transparent to the public, it is considered best practice to use a new address for each transaction in order to maintain your privacy.
Sending
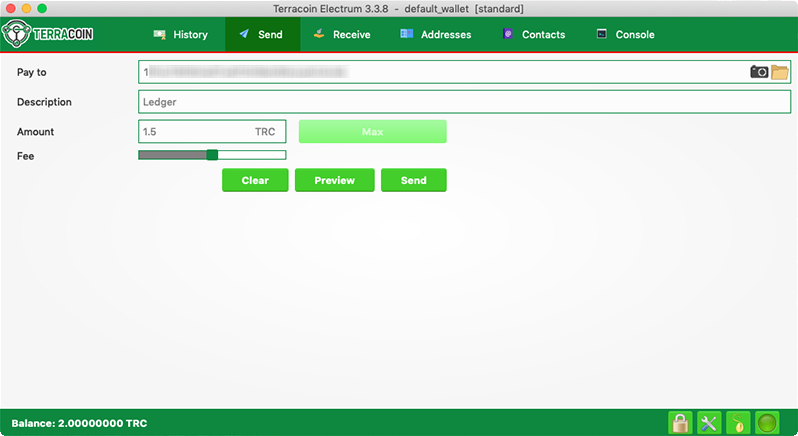
Click the Send tab to make a payment. Enter the destination address in the Pay to field, selecting a contact from the Contacts tab or manually or by pasting from the clipboard. Optionally enter a Description for to appear in your transaction history, followed by the Amount to be sent. The total amount of the transaction is the sum of the sent amount and transaction fee, which is calculated automatically. Terracoin Electrum issues a warning if the total transaction amount exceeds the wallet balance.
Transaction ready to send in Terracoin Electrum wallet
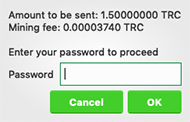
The wallet will request your password, then broadcast the transaction to the network and display a confirmation dialog with your transaction ID.
Password prompt and transaction confirmation in Terracoin Electrum wallet
Receiving
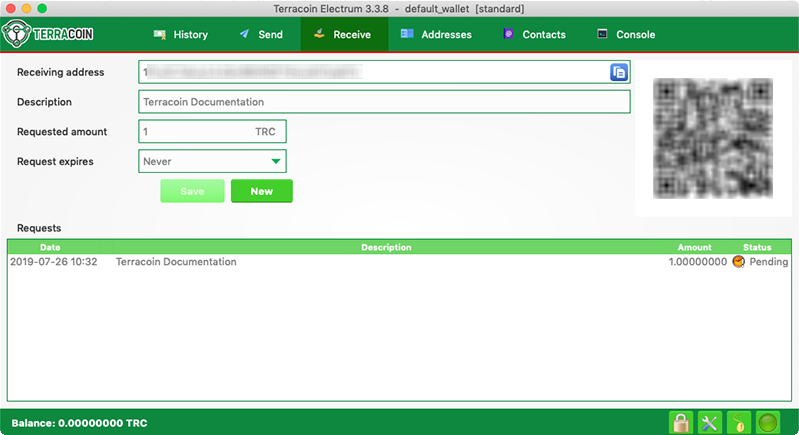
You can view your receiving addresses by clicking the Receive tab. Double-click the Receiving address, then copy it to the clipboard by clicking the Copy to clipboard icon. If you intend to use the address repeatedly, you can also enter a description click Save to store the address in the Requests list. Clicking an address in the list will display the stored information in the top area, together with a QR code containing the same information.
Transaction ready to send in Terracoin Electrum wallet
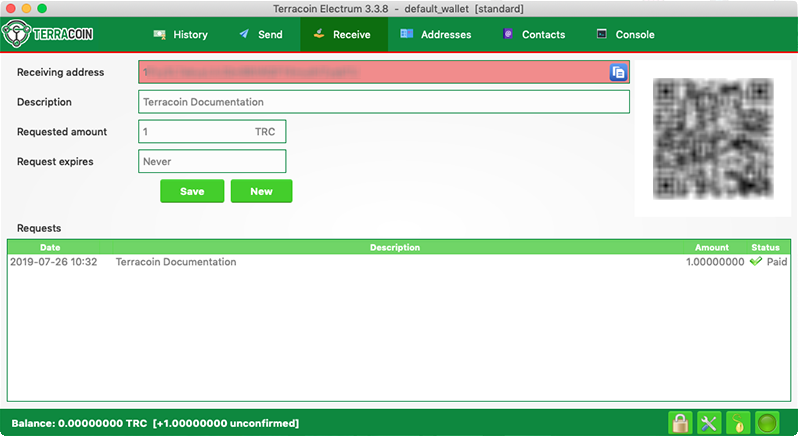
Enter this address in the software sending the funds, send it to the person transferring funds to you or scan it directly from your mobile wallet. Once the transaction is complete, the balance will appear in the lower left corner of your wallet, and the indicator in the Requests table will change from Pending to Paid.
Successfully received payment in Terracoin Electrum wallet
Once you have used an address, you can either continue using it or click New to generate a new address.
Monitoring transactions
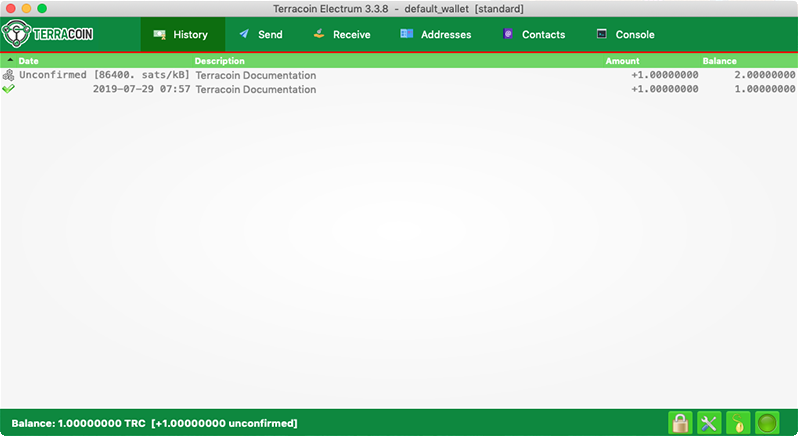
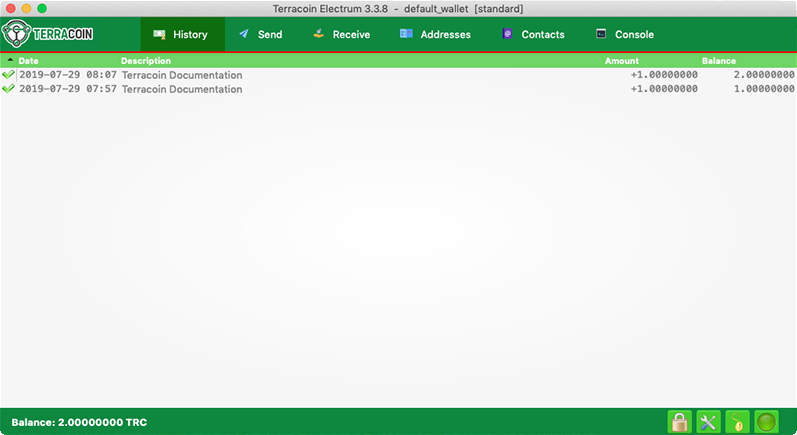
The History tab lists all current and pending transactions. A transaction to an address in your wallet will appear in the list soon after it is made. Initially, this transaction will be marked as Unconfirmed, followed by a clock indicator on the left. As the Terracoin network processes the transaction, the status will update in the transaction history list. The network confirms transactions with a new block roughly every 2 minutes, and a transaction is considered confirmed (and therefore spendable) after six confirmations. These processed transactions are denoted with a green checkmark and the timestamp at which the transaction was made.
Terracoin Electrum wallet History tab immediately after receiving a transaction and after confirmation is complete
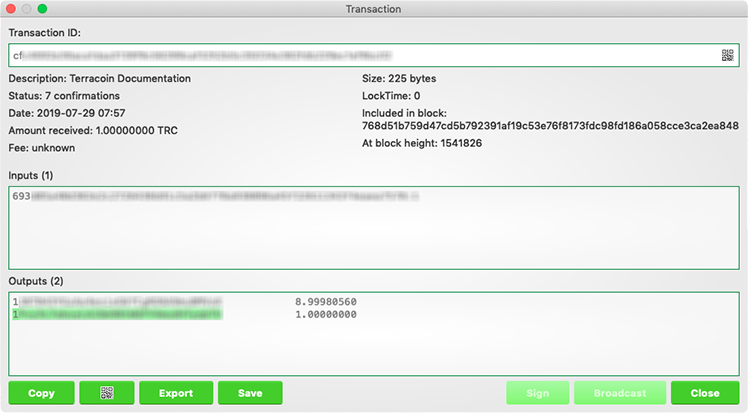
To view additional transaction details, right click a transaction on the History tab and select Details from the context menu. You can also use this menu to copy the transaction ID to the clipboard (this can be used as proof that a given transaction occurred), edit the transaction description for your records or view the transaction on an external block explorer.
Transaction details in Terracoin Electrum wallet

