Terracoin Electrum Wallet
Terracoin Electrum is a light wallet which uses powerful external servers to index the blockchain, while still securing the keys on your personal computer. Transactions are verified on the Terracoin blockchain using a technique called Secure Payment Verification (SPV), which only requires the block headers and not the full block. This means that wallet startup is almost instant, while still keeping your funds secure and mobile. It does not currently support advanced InstantSend and PrivateSend features.
Terracoin Electrum is a fork of the Electrum wallet for Bitcoin. While this documentation focuses on using Terracoin Electrum, full documentation of all Bitcoin Electrum features (mostly identical in Terracoin Electrum) is available at the official documentation site.
Contents
- 1 Installation
- 2 Sending and receiving
- 3 Wallet security
- 4 Frequently Asked Questions
- 4.1 How does Terracoin Electrum work?
- 4.2 Does Terracoin Electrum trust servers?
- 4.3 What is the Seed?
- 4.4 How secure is the seed?
- 4.5 What are change addresses?
- 4.6 How can I send the maximum available in my wallet?
- 4.7 How can I send TRC without paying a transaction fee?
- 4.8 Is there a way to enter amounts in fiat in Terracoin Electrum?
- 4.9 What does it mean to “Freeze” an address in Terracoin Electrum?
- 4.10 How is the wallet encrypted?
- 4.11 I have forgotten my password but still have my seed. Is there any way I can recover my password?
- 4.12 Does Terracoin Electrum support cold wallets?
- 4.13 Can I import private keys from other Terracoin clients?
- 4.14 Can I sweep private keys from other Terracoin clients?
- 4.15 Where is my wallet file located?
- 4.16 Can I do bulk payments with Terracoin Electrum?
- 4.17 Can Terracoin Electrum create and sign raw transactions?
- 4.18 Terracoin Electrum freezes when I try to send TRC
- 4.19 What is the gap limit?
- 4.20 How can I pre-generate new addresses?
- 4.21 How to upgrade Terracoin Electrum?
- 5 Advanced functions
- 5.1 Masternodes in Terracoin Electrum
- 5.2 Multisig wallets
- 5.3 Sweep a paper wallet
- 5.4 Cold storage
- 5.5 Command line
- 5.6 Using cold storage with the command line
- 5.7 How to accept TRC on a website using Terracoin Electrum
Installation
Download
You can download Terracoin Electrum from the official Terracoin website or the Terracoin Electrum minisite.
Terracoin Electrum is developed by The Terracoin Foundation and is released through GitHub.
You can optionally verify the integrity of your download by running the following commands (example for Linux):
wget https://github.com/terracoin/electrum-trc/releases/download/3.3.8/Terracoin-Electrum-3.3.8.tar.gz
sha256sum https://github.com/terracoin/electrum-trc/releases/download/3.3.8/Terracoin-Electrum-3.3.8.tar.gz
wget https://github.com/terracoin/electrum-trc/releases/download/3.3.8/SHA256SUMS.txt.asc
cat SHA256SUMS.txt.asc
Linux
As of version 3.0.6, it requires Python 3 to run.
Enter the following commands (changing the version number to match the current version as necessary) in the terminal to install Terracoin Electrum from the source tarball:
sudo apt install python3-pyqt5 python3-pip python3-setuptools
wget https://github.com/terracoin/electrum-trc/releases/download/3.3.8/Terracoin-Electrum-3.3.8.tar.gz
tar -zxvf Terracoin-Electrum-3.3.8.tar.gz
cd Terracoin-Electrum-3.3.8
sudo python3 setup.py install
macOS
Simply download and run the DMG file. You may need to grant permission to install, depending on your security settings. Click through the installation wizard and run Terracoin Electrum from your Applications folder when complete.
Windows
Simply download and run the installer file to set up Terracoin Electrum. You may need to grant permission to install, depending on your security settings. Click through the installation wizard and run Terracoin Electrum from the Start menu when complete.
Android
Download and run the APK file from https://terracoin.io/electrum/ to set up Terracoin Electrum. You may need to grant permission to install from unknown sources, depending on your security settings. Click through the installation wizard and run Terracoin Electrum when complete.
Creating a New Wallet
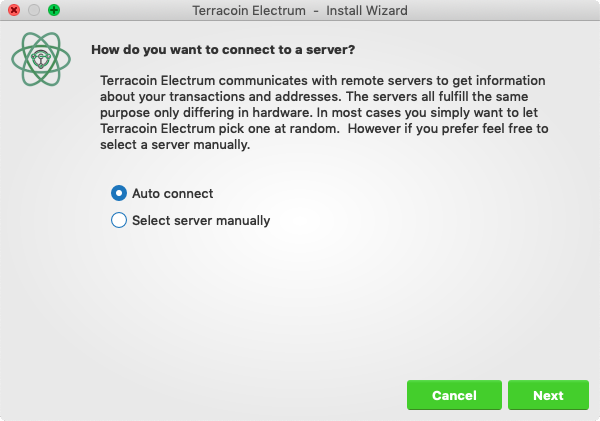
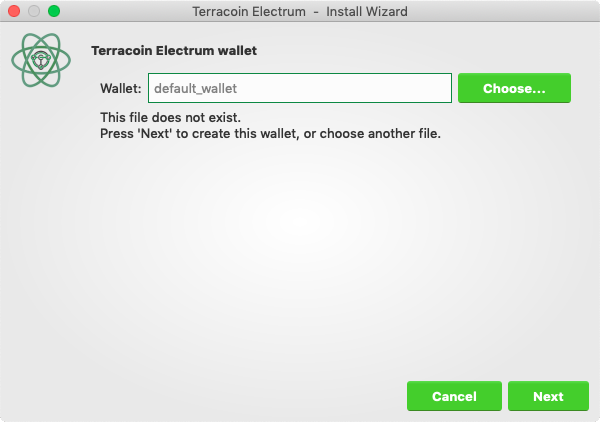
Terracoin Electrum gathers configuration data when run for the first time. For more on the concepts behind this process, skip to the later sections of this guide discussing backups, security, and addresses. When setting up Terracoin Electrum for the first time, a wizard will guide you through the process of creating your first wallet. The first screen asks how you would like to connect to the remote server. Select Auto connect and click Next to continue. You will see a notice that no wallet currently exists. Enter a name for your wallet (or accept the default name) and click Next to create your wallet.
Selecting the server and naming your first wallet
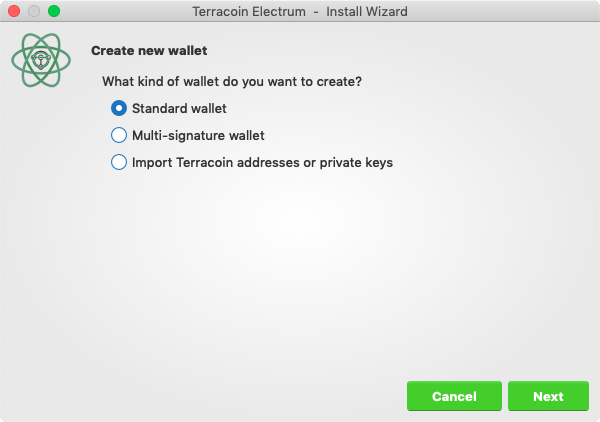
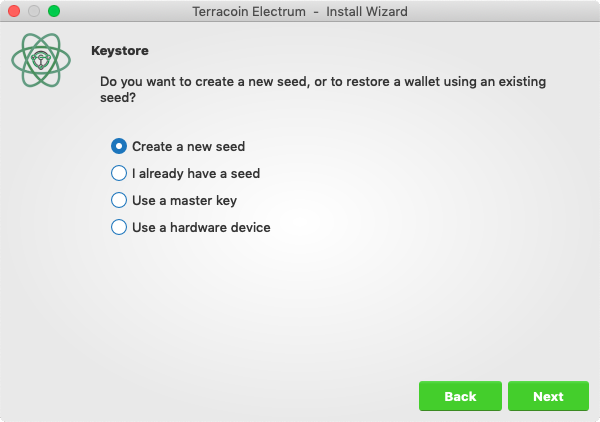
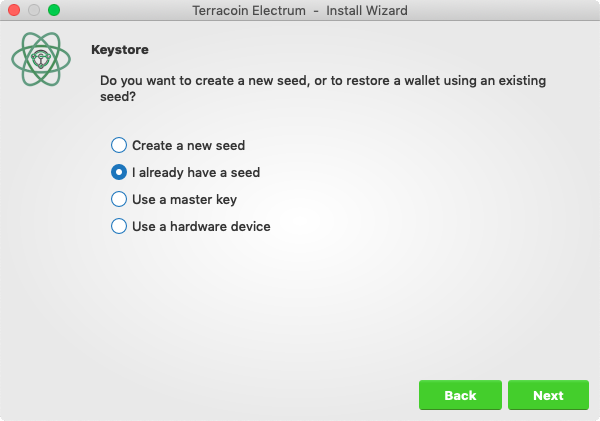
You will be asked what kind of wallet you want to create. Choose between Standard wallet, Multi-signature wallet and Watch Terracoin addresses. If you are unsure, select Standard wallet and click Next to continue. You will then be asked how you want to store/recover the seed. If stored safely, a seed can be used to restore a lost wallet on another computer. Choose between Create a new seed, I already have a seed, Use public or private keys or Use a hardware device. If you are using Terracoin Electrum for the first time and not restoring an existing wallet, choose Create a new seed and click Next to continue.
Selecting the wallet type and keystore
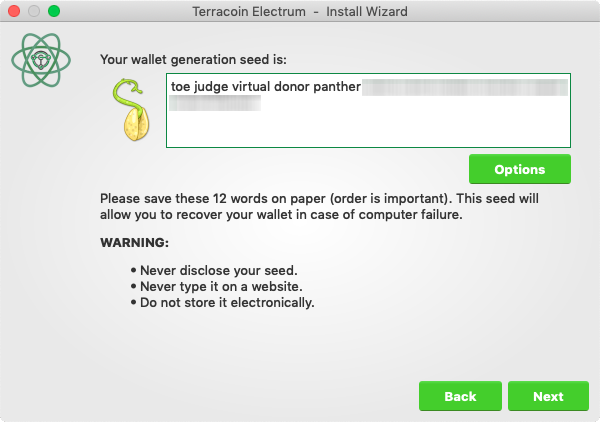
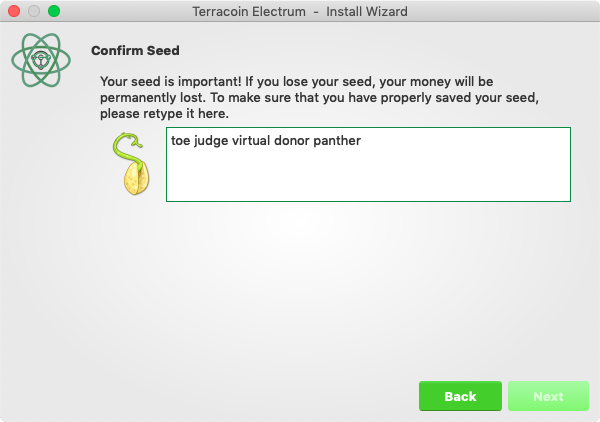
Terracoin Electrum will generate your wallet and display the recovery seed. Write this seed down, ideally on paper and not in an electronic format, and store it somewhere safe. This seed is the only way you can recover your wallet if you lose access for any reason. To make sure you have properly saved your seed, Terracoin Electrum will ask you to type it in as a confirmation. Type the words in the correct order and click Next to continue.
Generating and confirming the recovery seed
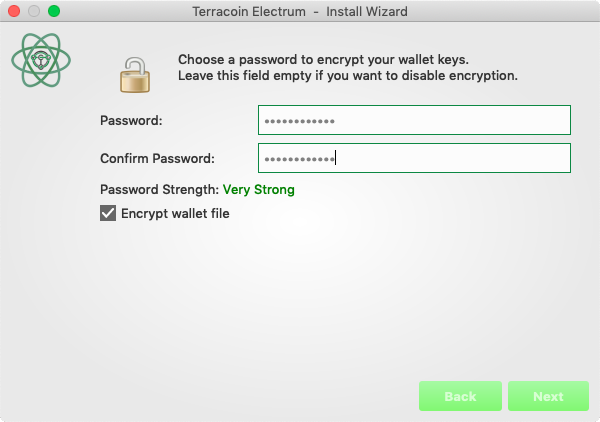
A password optionally secures your wallet against unauthorized access. Adding a memorable, strong password now improves the security of your wallet by encrypting your seed from the beginning. Skipping encryption at this point by not selecting a password risks potential theft of funds later, however unlikely the threat may be. Enter and confirm a password, ensure the Encrypt wallet file checkbox is ticked and click Next to continue.
Entering and confirming a wallet encryption password
Your Terracoin Electrum wallet is now set up and ready for use.
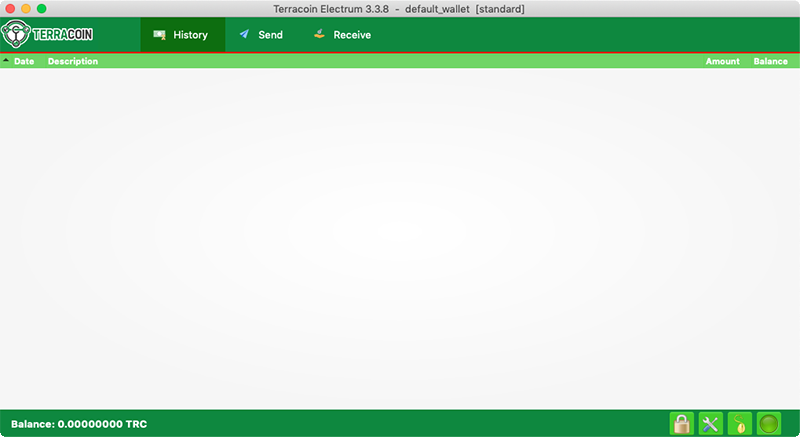
Terracoin Electrum after setup is complete
Sending and receiving
You may own TRC stored in another software wallet, or on an exchange such as CoinExchange or Cratex, or simply want to send or receive funds as a wage or business transaction. Funds can be transferred between these source and the Terracoin Electrum wallet using Terracoin addresses. Your wallet contains multiple addresses, and will generate new addresses as necessary. Since the Terracoin blockchain is transparent to the public, it is considered best practice to use a new address for each transaction in order to maintain your privacy.
Sending
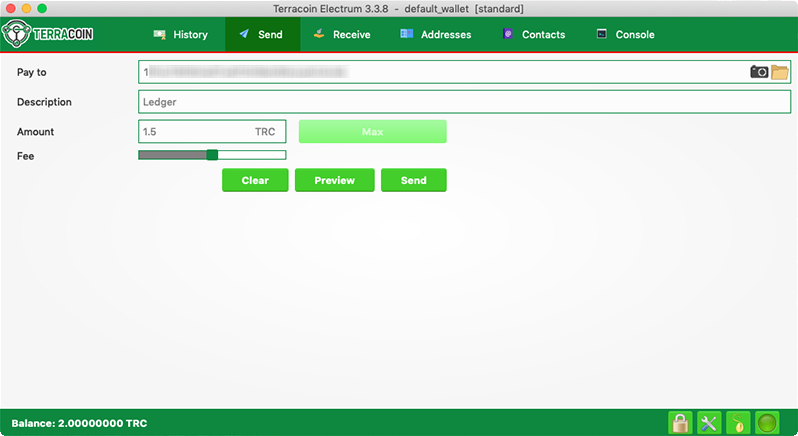
Click the Send tab to make a payment. Enter the destination address in the Pay to field, selecting a contact from the Contacts tab or manually or by pasting from the clipboard. Optionally enter a Description for to appear in your transaction history, followed by the Amount to be sent. The total amount of the transaction is the sum of the sent amount and transaction fee, which is calculated automatically. Terracoin Electrum issues a warning if the total transaction amount exceeds the wallet balance.
Transaction ready to send in Terracoin Electrum wallet
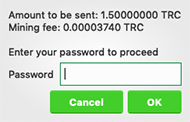
The wallet will request your password, then broadcast the transaction to the network and display a confirmation dialog with your transaction ID.
Password prompt and transaction confirmation in Terracoin Electrum wallet
Receiving
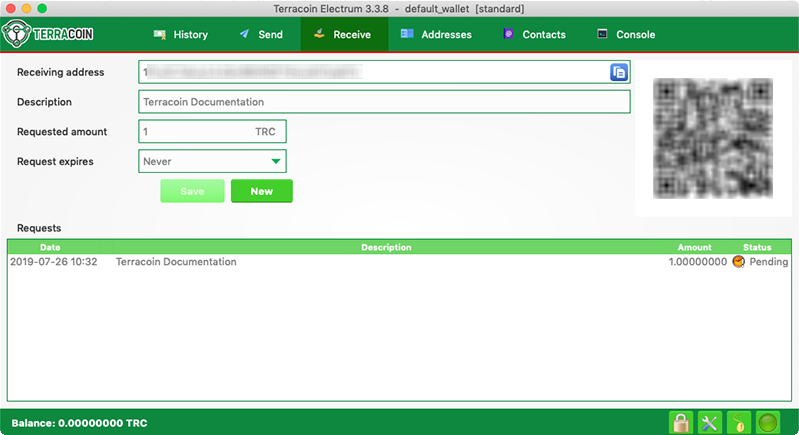
You can view your receiving addresses by clicking the Receive tab. Double-click the Receiving address, then copy it to the clipboard by clicking the Copy to clipboard icon. If you intend to use the address repeatedly, you can also enter a description click Save to store the address in the Requests list. Clicking an address in the list will display the stored information in the top area, together with a QR code containing the same information.
Transaction ready to send in Terracoin Electrum wallet
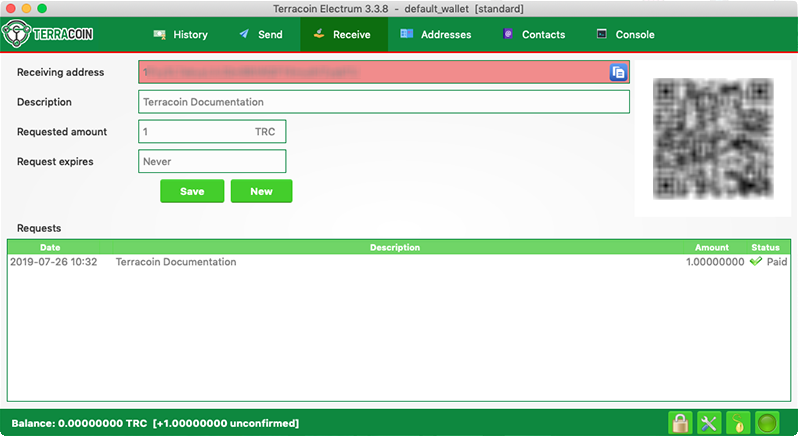
Enter this address in the software sending the funds, send it to the person transferring funds to you or scan it directly from your mobile wallet. Once the transaction is complete, the balance will appear in the lower left corner of your wallet, and the indicator in the Requests table will change from Pending to Paid.
Successfully received payment in Terracoin Electrum wallet
Once you have used an address, you can either continue using it or click New to generate a new address.
Monitoring transactions
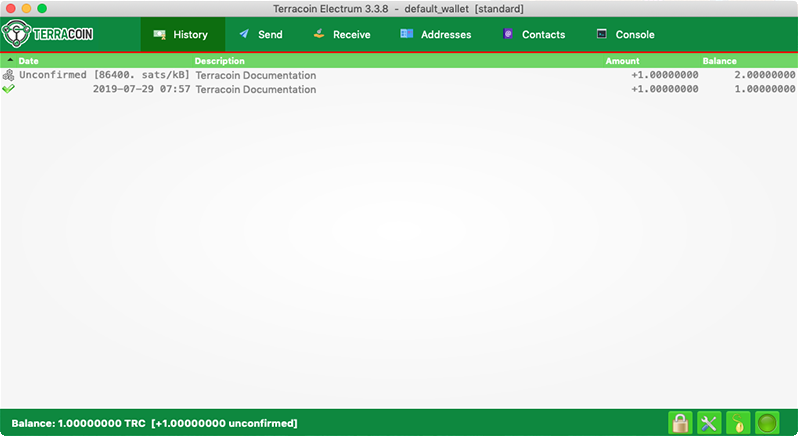
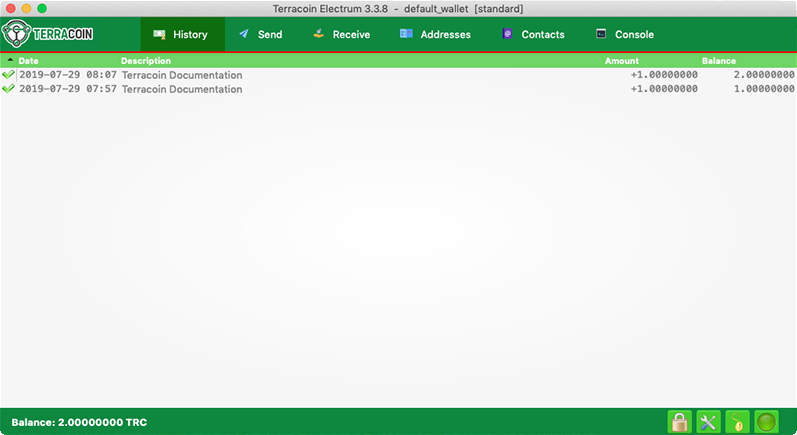
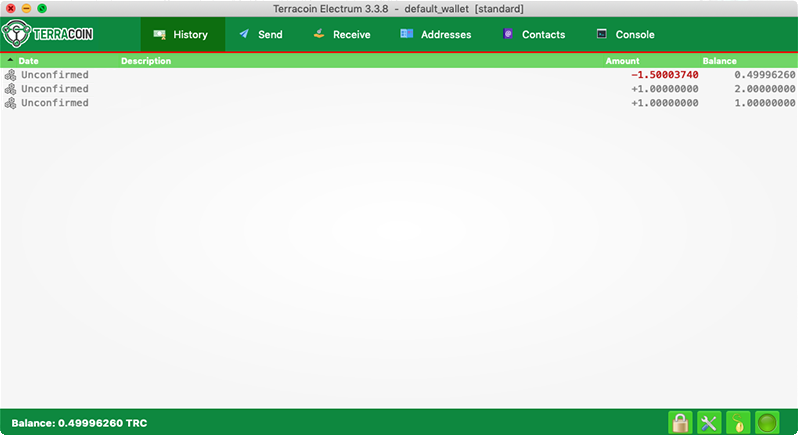
The History tab lists all current and pending transactions. A transaction to an address in your wallet will appear in the list soon after it is made. Initially, this transaction will be marked as Unconfirmed, followed by a clock indicator on the left. As the Terracoin network processes the transaction, the status will update in the transaction history list. The network confirms transactions with a new block roughly every 2 minutes, and a transaction is considered confirmed (and therefore spendable) after six confirmations. These processed transactions are denoted with a green checkmark and the timestamp at which the transaction was made.
Terracoin Electrum wallet History tab immediately after receiving a transaction and after confirmation is complete
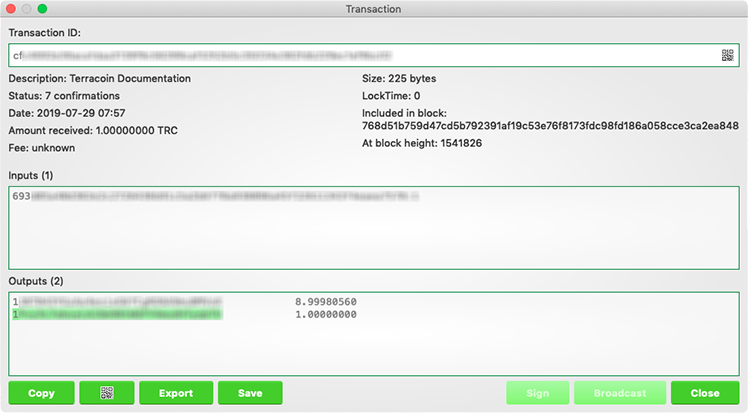
To view additional transaction details, right click a transaction on the History tab and select Details from the context menu. You can also use this menu to copy the transaction ID to the clipboard (this can be used as proof that a given transaction occurred), edit the transaction description for your records or view the transaction on an external block explorer.
Transaction details in Terracoin Electrum wallet
Wallet security
Change password
To change the wallet’s password, select the Wallet > Password option from the main menu, or click on the lock icon in the lower right of the main window. Enter and confirm a new secure password. Should you forget your wallets’ password, all is not lost. Your wallet can be restored in its entirety using the backup procedure described here.
Backup
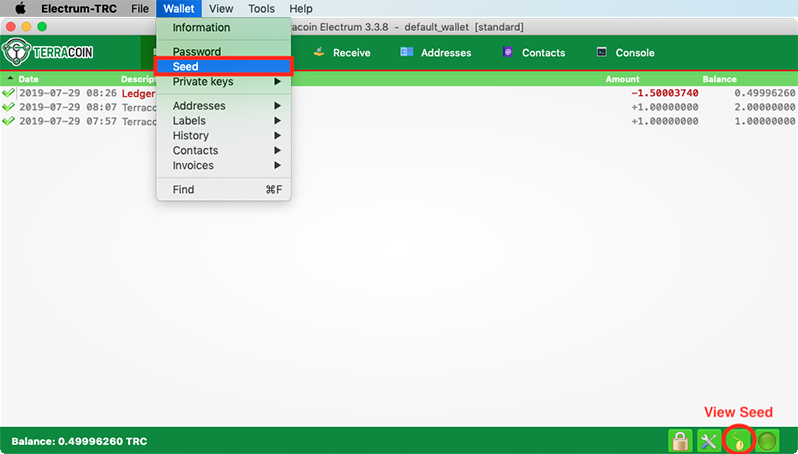
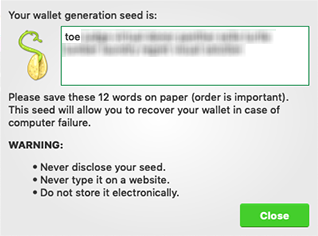
In Terracoin Electrum, a seed is a complete backup of all addresses and transactions. Access your wallet’s seed through the seed icon in the lower right of the main screen, or the Wallet > Seed main menu option. When prompted, enter the secure password you chose when setting up the Terracoin Electrum wallet.
Displaying the wallet recovery seed in Terracoin Electrum
Hand-copy the twelve words found in the box to a piece of paper and store it in a safe location. Remember, anyone who finds your seed can spend all of the funds in your wallet.
Viewing the recovery seed
Alternatively, a backup file can be saved using the File > Save Copy main menu option. This file stores the wallet’s encrypted seed along with any imported addresses. Restoring this backup will require the wallet password.
Restore
The only thing needed to recover a Terracoin Electrum wallet on another computer is its seed. You can test wallet recovery with your current installation of Terracoin Electrum by selecting the File > New/Restore menu item. A dialog will appear asking you to name your new wallet. Enter a name, select Standard wallet as the wallet type and then choose I already have a seed.
Restoring a wallet from an existing seed
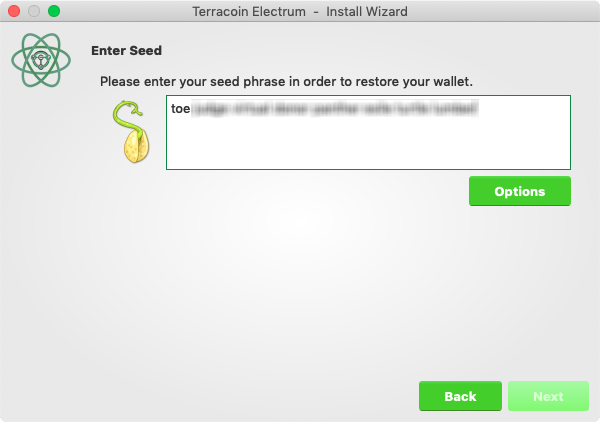
Next, copy the twelve word seed into the text field.
Entering the recovery seed
If your seed was entered correctly, Terracoin Electrum gives you the option to add a password for your wallet. After restoring your wallet, Terracoin Electrum will list any existing transactions from this wallet. This process may take a few minutes, and the transactions may appear as Not Verified. This problem disappears after restarting the program.
Unverified transactions after recovery
To restore a wallet file without using the recovery seed, copy the file to the application data folder according to your operating system:
- Linux: Open Files, select Go > Go to folder, copy the path
~/.electrum-trc
and paste it into the dialog box. - macOS: Open Finder, select Go > Go to Folder, copy the path
~/.electrum-trc
and paste it into the dialog box. - Windows: Open Explorer, copy the path
%APPDATA%\Electrum-TRC
and paste it in to the address bar.
Frequently Asked Questions
How does Terracoin Electrum work?
Terracoin Electrum focuses on speed, low resource usage and providing a simple user experience for Terracoin. Startup times are instant because it operates in conjunction with high-performance servers that handle the most complicated parts of the Terracoin system.
Does Terracoin Electrum trust servers?
Not really; the Terracoin Electrum client never sends private keys to the servers. In addition, it verifies the information reported by servers using a technique called Simple Payment Verification.
What is the Seed?
The seed is a random phrase that is used to generate your private keys. Example:
constant forest adore false green weave stop guy fur freeze giggle clock
Your wallet can be entirely recovered from its seed. To do this, select the I already have a seed option during startup.
How secure is the seed?
The seed created by Terracoin Electrum has 128 bits of entropy. This means that it provides the same level of security as a Terracoin private key (of length 256 bits). Indeed, an elliptic curve key of length n provides n/2 bits of security.
What are change addresses?
The Terracoin Electrum wallet design and workflow are based on a concept called a “wallet generation seed”. This seed is a unique, randomly selected list of twelve words. A Terracoin Electrum wallet uses its seed as a template for generating addresses.
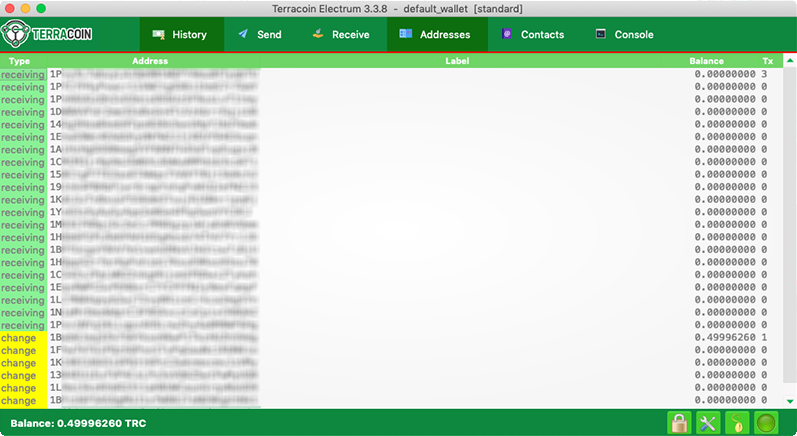
Receiving and change addresses in Terracoin Electrum
Notice that the total balance does not only show the sum of all receiving addresses, but also the separately listed Change addresses. Where did these new change addresses come from and why does the first one now hold funds?
Terracoin is an electronic cash system, meaning that it shares much in common with the process of using paper banknotes. Although some cash payments involve exact change, many do not. You tend to “overpay” when using cash, and expect to receive the difference as change. Perhaps surprisingly, this is how Terracoin transactions work as well. If the entire balance of an address is not required for any given transaction, the remainder is sent to a new and unused address under control of the same wallet. This address is generated deterministically (rather than randomly) from the wallet seed, which means that any other wallet will also regenerate the change addresses in the same order from the same recovery seed, and have access to the balances.
Spending the entire balance and sending any remainder to a change address is considered good practice because it prevents the transaction recipient from linking transactions by browsing the blockchain, thus compromising your privacy. If privacy is not a concern, change addresses can be disabled via the Tools > Terracoin Electrum preferences menu option.
How can I send the maximum available in my wallet?
Type an exclamation mark (!) in the Amount field or simply click the Max button. The fee will be automatically adjusted for that amount.
How can I send TRC without paying a transaction fee?
You can create a zero fee transaction in the GUI by following these steps:
- Enable the Edit fees manually option
- Enter 0 in the Fee field
- Enter the amount in the Amount field
Note that transactions without fees might not be relayed by the Terracoin Electrum server, or by the Terracoin network.
Is there a way to enter amounts in fiat in Terracoin Electrum?
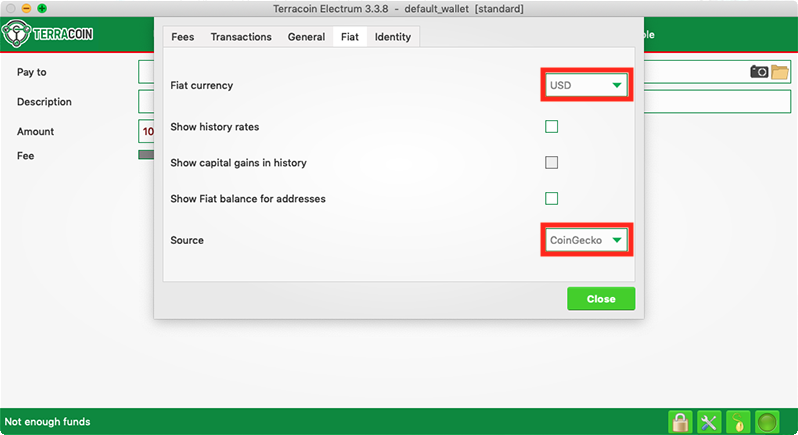
Yes, go to Tools > Prefernce > Fiat and select a Fiat currency to display the current exchange rate from the chosen Source.
Entering values in fiat currency in Terracoin Electrum
What does it mean to “Freeze” an address in Terracoin Electrum?
When you freeze an address, the funds in that address will not be used for sending TRC. You cannot send TRC if you don’t have enough funds in your non-frozen addresses.
How is the wallet encrypted?
Terracoin Electrum uses two separate levels of encryption:
- Your seed and private keys are encrypted using AES-256-CBC. The private keys are decrypted only briefly, when you need to sign a transaction; for this you need to enter your password. This is done in order to minimize the amount of time during which sensitive information is unencrypted in your computer’s memory.
- In addition, your wallet file may be encrypted on disk. Note that the wallet information will remain unencrypted in the memory of your computer for the duration of your session. If a wallet is encrypted, then its password will be required in order to open it. Note that the password will not be kept in memory; Terracoin Electrum does not need it in order to save the wallet on disk, because it uses asymmetric encryption (ECIES).
Wallet file encryption is activated by default since version 2.8. It is intended to protect your privacy, but also to prevent you from requesting TRC on a wallet that you do not control.
I have forgotten my password but still have my seed. Is there any way I can recover my password?
It is not possible to recover your password. However, you can restore your wallet from its seed phrase and choose a new password. If you lose both your password and your seed, there is no way to recover your money. This is why we ask you to save your seed phrase on paper.
To restore your wallet from its seed phrase, create a new wallet, select the type, choose I already have a seed and proceed to input your seed phrase.
Does Terracoin Electrum support cold wallets?
Yes. See the cold storage section under Advanced functions > Cold storage bellow.
Can I import private keys from other Terracoin clients?
In Terracoin Electrum 2.0, you cannot import private keys in a wallet that has a seed. You should sweep them instead.
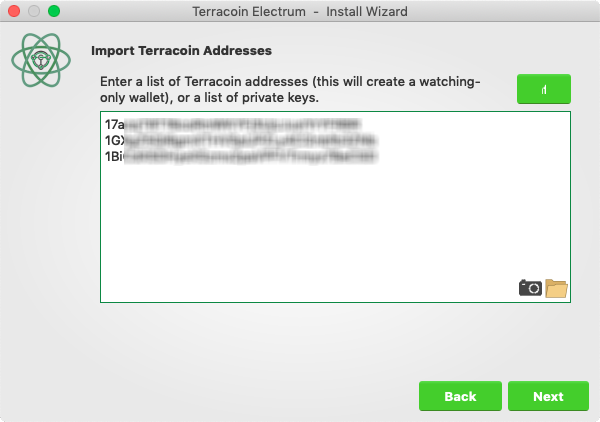
If you want to import private keys and not sweep them you need to create a special wallet that does not have a seed. For this, create a new wallet, select Use public or private keys, and instead of typing your seed, type a list of private keys, or a list of addresses if you want to create a watching-only wallet. A master public (xpub) or private (xprv) will also work to import a hierarchical deterministic series of keys. You will need to back up this wallet, because it cannot be recovered from seed.
Importing a list of private keys to create a wallet
Can I sweep private keys from other Terracoin clients?
Sweeping private keys means to send all the TRC they control to an existing address in your wallet. The private keys you sweep do not become a part of your wallet. Instead, all the TRC they control are sent to an address that has been deterministically generated from your wallet seed.
To sweep private keys go to Wallet > Private Keys > Sweep. Enter the private keys in the appropriate field. Leave the Address field unchanged. This is the destination address from your existing Terracoin Electrum wallet. Click on Sweep. Terracoin Electrum then takes you to the Send tab where you can set an appropriate fee and then click on Send to send the coins to your wallet.
Where is my wallet file located?
The default wallet file is called default_wallet and is created when you first run the application. It is located under the /wallets folder.
- Linux: Open Files, select Go > Go to folder, copy the path
~/.electrum-trc
and paste it into the dialog box. - macOS: Open Finder, select Go > Go to Folder, copy the path
~/.electrum-trc
and paste it into the dialog box. - Windows: Open Explorer, copy the path
%APPDATA%\Electrum-TRC
and paste it in to the address bar.
Can I do bulk payments with Terracoin Electrum?
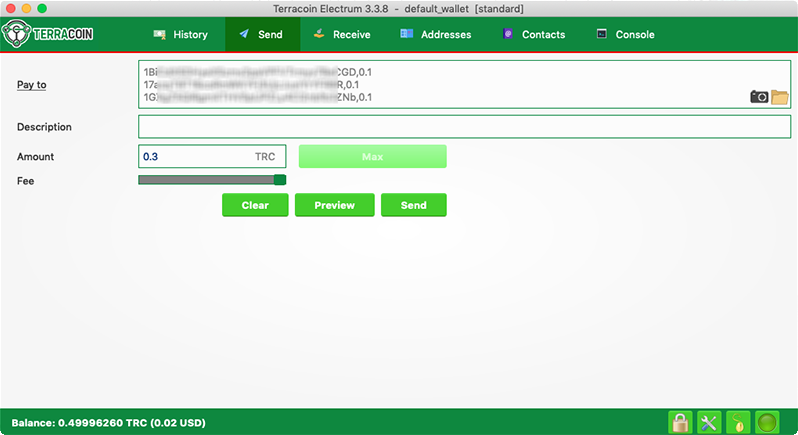
You can create a transaction with several outputs. In the GUI, type each address and amount on a line, separated by a comma.
Creating a transaction with multiple outputs in Terracoin Electrum
Amounts are in the current unit set in the client. The total is shown in the GUI. You can also import a CSV file in the Pay to field by clicking on the folder icon.
Can Terracoin Electrum create and sign raw transactions?
Terracoin Electrum lets you create and sign raw transactions right from the user interface using a form.
Terracoin Electrum freezes when I try to send TRC
This might happen if you are trying to spend a large number of transactions outputs (for example, if you have collected hundreds of master node rewards). When you send TRC, Terracoin Electrum looks for unspent coins that are in your wallet in order to create the new transaction. Unspent coins can have different values, much like physical coins and bills.
If this happens, you should consolidate your transaction inputs by sending smaller amounts of TRC to one of your wallet addresses; this would be the equivalent of exchanging a stack of nickels for a dollar bill.
What is the gap limit?
The gap limit is the maximum number of consecutive unused addresses in your deterministic sequence of addresses. Terracoin Electrum uses it in order to stop looking for addresses. In Terracoin Electrum 2.0, it is set to 20 by default, so the client will get all addresses until 20 unused addresses are found.
How can I pre-generate new addresses?
Terracoin Electrum will generate new addresses as you use them, until it hits the gap limit.
If you need to pre-generate more addresses, you can do so by typing wallet.create_new_address() in the console. This command will generate one new address. Note that the address will be shown with a red background in the address tab, to indicate that it is beyond the gap limit. The red color will remain until the gap is filled.
WARNING: Addresses beyond the gap limit will not automatically be recovered from seed. To recover them will require either increasing the client’s gap limit or generating new addresses until the used addresses are found.
If you wish to generate more than one address, you may use a ‘for’ loop. For example, if you wanted to generate 50 addresses, you could do this:
for x in range(0, 50):
  print wallet.create_new_address()
How to upgrade Terracoin Electrum?
Warning: always save your wallet seed on paper before doing an upgrade.
To upgrade Terracoin Electrum, just install the most recent version. The way to do this will depend on your OS. Note that your wallet files are stored separately from the software, so you can safely remove the old version of the software if your OS does not do it for you.
Some Terracoin Electrum upgrades will modify the format of your wallet files. For this reason, it is not recommended to downgrade Terracoin Electrum to an older version once you have opened your wallet file with the new version. The older version will not always be able to read the new wallet file.
The following issues should be considered when upgrading Terracoin Electrum 1.x wallets to Terracoin Electrum 2.x:
- Terracoin Electrum 2.x will need to regenerate all of your addresses during the upgrade process. Please allow it time to complete, and expect it to take a little longer than usual for Terracoin Electrum to be ready.
- The contents of your wallet file will be replaced with a Terracoin Electrum 2 wallet. This means Terracoin Electrum 1.x will no longer be able to use your wallet once the upgrade is complete.
- The Addresses tab will not show any addresses the first time you launch Terracoin Electrum 2. This is expected behaviour. Restart Terracoin Electrum 2 after the upgrade is complete and your addresses will be available.
- Offline copies of Terracoin Electrum will not show the addresses at all because it cannot synchronize with the network. You can force an offline generation of a few addresses by typing the following into the Console: wallet.synchronize(). When it’s complete, restart Terracoin Electrum and your addresses will once again be available.
Advanced functions
Terracoin Electrum is based on Electrum, a Bitcoin wallet. Most functions are identical, which means it is not necessary to reproduce the entirety of the Electrum documentation here. The following sections describe some frequently used advanced functions. For further details on other advanced functions in Electrum for both Bitcoin and Terracoin, please click the links below.
- Electrum documentation
- Electrum seed version system
- Electrum protocol specification
- Serialization of unsigned or partially signed transactions
- Simple Payment Verification
- The Python Console
- Using Electrum Through Tor
Masternodes in Terracoin Electrum
Work in Progress
Multisig wallets
This tutorial shows how to create a 2 of 2 multisig wallet. A 2 of 2 multisig consists of 2 separate wallets (usually on separate machines and potentially controlled by separate people) that have to be used in conjunction in order to access the funds. Both wallets have the same set of addresses.
- A common use-case for this is if you want to collaboratively control funds: maybe you and your friend run a company together and certain funds should only be spendable if you both agree.
- Another one is security: one of the wallets can be on your main machine, while the other one is on a offline machine. That way you make it very hard for an attacker or malware to steal your coins.
Create a pair of 2-of-2 wallets
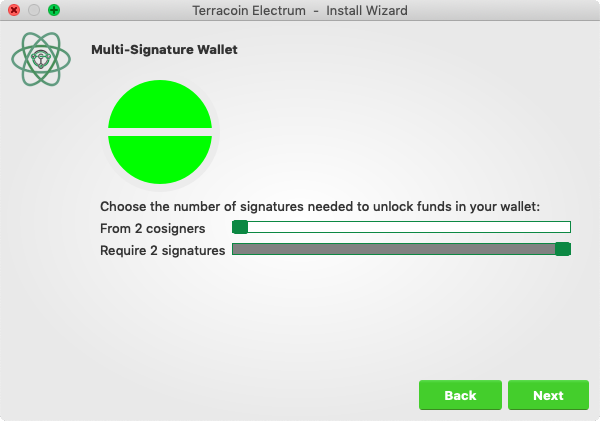
Each cosigner needs to do this: In the menu select File > New, then select Multi-signature wallet. On the next screen, select 2 of 2.
Selecting x of y signatures for a multi-signature wallet
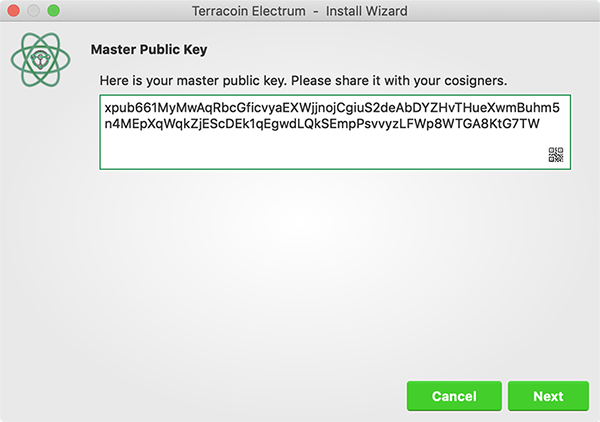
After generating and confirming your recovery seed, you will be shown the xpub address for this wallet.
xpub key of the first wallet
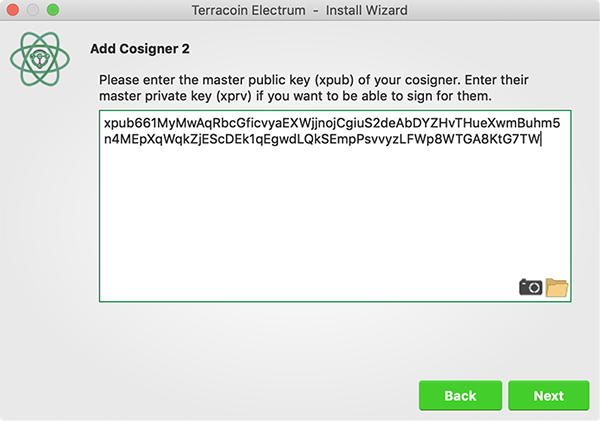
After generating a seed (keep it safely!) you will need to provide the master public key of the other wallet. Of course when you create the other wallet, you put the master public key of the first wallet.
Entering xpub from the second wallet in the first wallet
You will need to do this in parallel for the two wallets. Note that you can press cancel during this step, and reopen the file later.
Receiving
Check that both wallets generate the same set of Addresses. You can now send to these Addresses (note they start with a “3”) with any wallet that can send to P2SH Addresses.
Sending
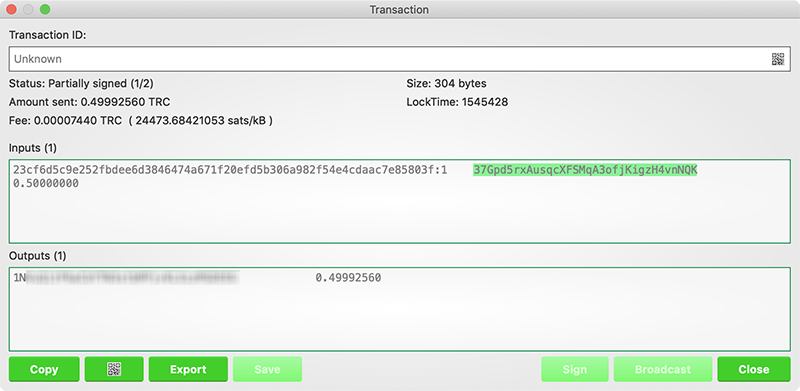
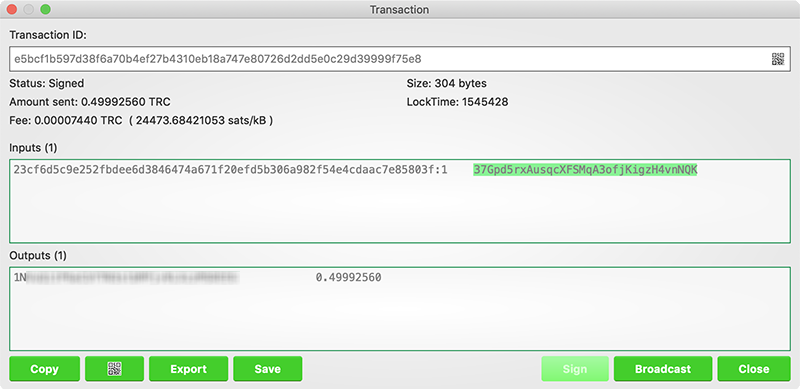
To spend coins from a 2-of-2 wallet, two cosigners need to sign a transaction collaboratively. To accomplish this, create a transaction using one of the wallets (by filling out the form on the Send tab). After signing, a window is shown with the transaction details.
Partially signed 2-of-2 multisig transaction in Terracoin Electrum
The transaction now has to be sent to the second wallet. Several options are available for this:
- You can transfer the file on a USB stick
You can save the partially signed transaction to a file (using the Save button), transfer that to the machine where the second wallet is running (via USB stick, for example) and load it there (using Tools > Load transaction > From file)
- You can use QR codes
A button showing a QR code icon is also available. Clicking this button will display a QR code containing the transaction, which can be scanned into the second wallet (Tools > Load Transaction > From QR Code)
With both of the above methods, you can now add the second signature to the transaction (using the Sign button). It will then be broadcast to the network.
Fully signed 2-of-2 multisig transaction in Terracoin Electrum
Sweep a paper wallet
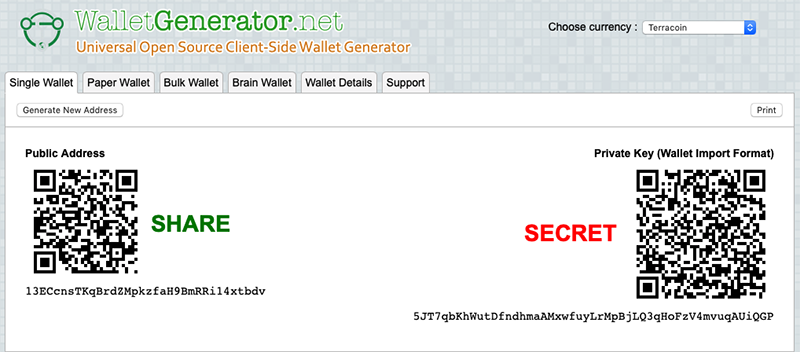
You may have received a paper wallet as a gift from another Terracoin user, or previously stored one in a safe deposit box. Funds are swept from a paper wallet into a live wallet by importing its private key, which is a long sequence of characters starting with the capital letter “K” or the capital letter “L”. The example below displays a private key (WIF format).
Public address and associated private key produced by Terracoin Paper Wallet Generator
Funds from paper wallets are swept into an Terracoin Electrum Wallet by creating a transaction using the private key and sending it to a new address from your wallet. This is necessary because it is not possible to add new public or private keys to an existing deterministic series of addresses derived from a seed phrase.
Begin by selecting the Wallet > Private Keys > Sweep menu item. The Sweep private keys dialog will appear, where you can paste your private key(s). An unused address controlled by your Terracoin Electrum wallet appears in the lower field, and can be changed by clicking the Address button. Once you have pasted your private key, click the Sweep button.
File:Terracoin-electrum-advanced-multisig6.png
Entering the private key
Terracoin Electrum then prepares a transaction using the private key you just imported to derive the public address for the transaction input and the address from your wallet as the output, and signs the message. Click Broadcast to enter the transaction on the blockchain. The balance will then appear in your wallet under the specified address. The address you swept is left with zero balance.
File:Terracoin-electrum-advanced-multisig7.png
Broadcasting the sweep transaction
Cold storage
This section shows how to create an offline wallet that holds your TRC and a watching-only online wallet that is used to view its history and to create transactions that have to be signed with the offline wallet before being broadcast on the online one.
Create an offline wallet
Create a wallet on an offline machine, as per the usual process (File > New). After creating the wallet, go to Wallet -> Master Public Keys.
File:Terracoin-electrum-advanced-masterkeys.png
Master Public Key of a new offline wallet
The Master Public Key of your wallet is the string shown in this popup window. Transfer that key to your online machine somehow.
Create a watching-only version of your wallet
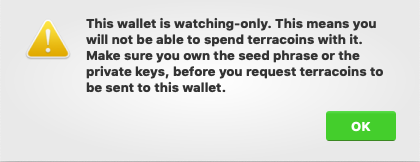
On your online machine, open Terracoin Electrum and select File > New/Restore. Enter a name for the wallet and select Use public or private keys. Paste your master public key in the box. Click Next to complete the creation of your wallet. When you’re done, you should see a popup informing you that you are opening a watching-only wallet.
Master Public Key of a new offline wallet
The transaction history of your cold wallet should then appear.
Create an unsigned transaction
Go to the Send tab on your online watching-only wallet, input the transaction data and click Send. A window will appear to inform you that a transaction fee will be added. Continue. In the window that appears up, click Save and save the transaction file somewhere on your computer. Close the window and transfer the transaction file to your offline machine (e.g. with a USB stick).
Sign your transaction
On your offline wallet, select Tools > Load transaction -> From file in the menu and select the transaction file created in the previous step. Click Sign. Once the transaction is signed, the Transaction ID appears in its designated field. Click Save, store the file somewhere on your computer, and transfer it back to your online machine.
Broadcast your transaction
On your online machine, select Tools -> Load transaction -> From file from the menu. Select the signed transaction file. In the window that opens up, click Broadcast. The transaction will be broadcast over the Terracoin network.
Command line
Terracoin Electrum has a powerful command line available when running under Linux or macOS. This section will show you a few basic principles.
Using the inline help
To see the list of Terracoin Electrum commands, type:
electrum help
To see the documentation for a command, type:
electrum help <command>
Magic words
The arguments passed to commands may be one of the following magic words: ! ? : -.
The exclamation mark ! is a shortcut that means ‘the maximum amount available’. Note that the transaction fee will be computed and deducted from the amount. Example:
electrum payto 15hETetDmcXm1mM4sEf7U2KXC9hDHFMSzz !
A question mark ? means that you want the parameter to be prompted. Example:
electrum signmessage 15hETetDmcXm1mM4sEf7U2KXC9hDHFMSzz ?
Use a colon : if you want the prompted parameter to be hidden (not echoed in your terminal). Note that you will be prompted twice in this example, first for the private key, then for your wallet password:
electrum importprivkey :
A parameter replaced by a dash - will be read from standard input (in a pipe):
cat LICENCE | electrum signmessage 15hETetDmcXm1mM4sEf7U2KXC9hDHFMSzz -
Aliases
You can use DNS aliases in place of bitcoin addresses, in most commands:
electrum payto ecdsa.net !
Formatting outputs using jq
Command outputs are either simple strings or json structured data. A very useful utility is the ‘jq’ program. Install it with:
sudo apt-get install jq
The following examples use it.
Sign and verify message
We may use a variable to store the signature, and verify it:
sig=$(cat LICENCE| electrum signmessage 15hETetDmcXm1mM4sEf7U2KXC9hDHFMSzz -)
And:
cat LICENCE | electrum verifymessage 15hETetDmcXm1mM4sEf7U2KXC9hDHFMSzz $sig -
Show the values of your unspents
The listunspent command returns a list of dict objects, with various fields. Suppose we want to extract the value field of each record. This can be achieved with the jq command:
electrum listunspent | jq 'map(.value)'
Select only incoming transactions from history
Incoming transactions have a positive ‘value’ field:
electrum history | jq '.[] | select(.value>0)'
Filter transactions by date
The following command selects transactions that were timestamped after a given date:
after=$(date -d '07/01/2015' +"%s")
electrum history | jq --arg after $after '.[] | select(.timestamp>($after|tonumber))'
Similarly, we may export transactions for a given time period:
before=$(date -d '08/01/2015' +"%s")
after=$(date -d '07/01/2015' +"%s")
electrum history | jq --arg before $before --arg after $after '.[] | select(.timestamp>($after|tonumber) and .timestamp<($before|tonumber))'
Encrypt and decrypt messages
First we need the public key of a wallet address:
pk=$(electrum getpubkeys 15hETetDmcXm1mM4sEf7U2KXC9hDHFMSzz | jq -r '.[0]')
Encrypt:
cat | electrum encrypt $pk -
Decrypt:
electrum decrypt $pk ?
Note: this command will prompt for the encrypted message, then for the wallet password.
Export private keys and sweep coins
The following command will export the private keys of all wallet addresses that hold some TRC:
electrum listaddresses --funded | electrum getprivatekeys -
This will return a list of lists of private keys. In most cases, you want to get a simple list. This can be done by adding a jq filer, as follows:
electrum listaddresses --funded | electrum getprivatekeys - | jq 'map(.[0])'
Finally, let us use this list of private keys as input to the sweep command:
electrum listaddresses --funded | electrum getprivatekeys - | jq 'map(.[0])' | electrum sweep - [destination address]
Using cold storage with the command line
This section will show you how to sign a transaction with an offline Terracoin Electrum wallet using the command line.
Create an unsigned transaction
With your online (watching-only) wallet, create an unsigned transaction:
electrum payto 15hETetDmcXm1mM4sEf7U2KXC9hDHFMSzz 0.1 --unsigned > unsigned.txn
The unsigned transaction is stored in a file named ‘unsigned.txn’. Note that the –unsigned option is not needed if you use a watching-only wallet.
You may view it using:
cat unsigned.txn | electrum deserialize -
Sign the transaction
The serialization format of Terracoin Electrum contains the master public key needed and key derivation used by the offline wallet to sign the transaction. Thus we only need to pass the serialized transaction to the offline wallet:
cat unsigned.txn | electrum signtransaction - > signed.txn
The command will ask for your password, and save the signed transaction in ‘signed.txn’.
Broadcast the transaction
Send your transaction to the Terracoin network, using broadcast:
cat signed.txn | electrum broadcast -
If successful, the command will return the ID of the transaction.
How to accept TRC on a website using Terracoin Electrum
This tutorial will show you how to accept TRC on a website with SSL signed payment requests. It is updated for Terracoin Electrum 2.6.
Requirements
- A webserver serving static HTML
- A SSL certificate (signed by a CA)
- Terracoin Electrum version >= 2.6
Create a wallet
Create a wallet on your web server:
electrum create
You can also use a watching only wallet (restored from xpub), if you want to keep private keys off the server. Once your wallet is created, start Terracoin Electrum as a daemon:
electrum daemon start
Add your SSL certificate to your configuration
You should have a private key and a public certificate for your domain. Create a file that contains only the private key:
-----BEGIN PRIVATE KEY-----
your private key
-----BEGIN END KEY-----
Set the path to your the private key file with setconfig:
electrum setconfig ssl_privkey /path/to/ssl.key
Create another file that contains your certificate and the list of certificates it depends on, up to the root CA. Your certificate must be at the top of the list, and the root CA at the end:
-----BEGIN CERTIFICATE-----
your cert
-----END CERTIFICATE-----
-----BEGIN CERTIFICATE-----
intermediate cert
-----END CERTIFICATE-----
-----BEGIN CERTIFICATE-----
root cert
-----END CERTIFICATE-----
Set the ssl_chain path with setconfig:
electrum setconfig ssl_chain /path/to/ssl.chain
Configure a requests directory
This directory must be served by your webserver (eg Apache):
electrum setconfig requests_dir /var/www/r/
By default, Terracoin Electrum will display local URLs, starting with ‘file://‘ In order to display public URLs, we need to set another configuration variable, url_rewrite. For example:
electrum setconfig url_rewrite "['file:///var/www/','https://electrum.org/']"
Create a signed payment request
electrum addrequest 3.14 -m "this is a test"
{
   "URI": "terracoin: 15hETetDmcXm1mM4sEf7U2KXC9hDHFMSzz?amount=3.14&r=https://electrum.org/r/7c2888541a",
   "address": "15hETetDmcXm1mM4sEf7U2KXC9hDHFMSzz",
   "amount": 314000000,
   "amount (TRC)": "3.14",
   "exp": 3600,
   "id": "7c2888541a",
   "index_url": "https://electrum.org/r/index.html?id=7c2888541a",
   "memo": "this is a test",
   "request_url": "https://electrum.org/r/7c2888541a",
   "status": "Pending",
   "time": 1450175741
}
This command returns a json object with two URLs:
- request_url is the URL of the signed BIP70 request.
- index_url is the URL of a webpage displaying the request.
Note that request_url and index_url use the domain name we defined in url_rewrite. You can view the current list of requests using the listrequests command.
Open the payment request page in your browser
Let us open index_url in a web browser.
File:Terracoin-electrum-advanced-webpay1.png
Payment request page in a web browser

